- Function assignment
- How to enable multi-domain crawling in Netpeak Spider
- Work with crawling results
- Usage example
1. Function assignment
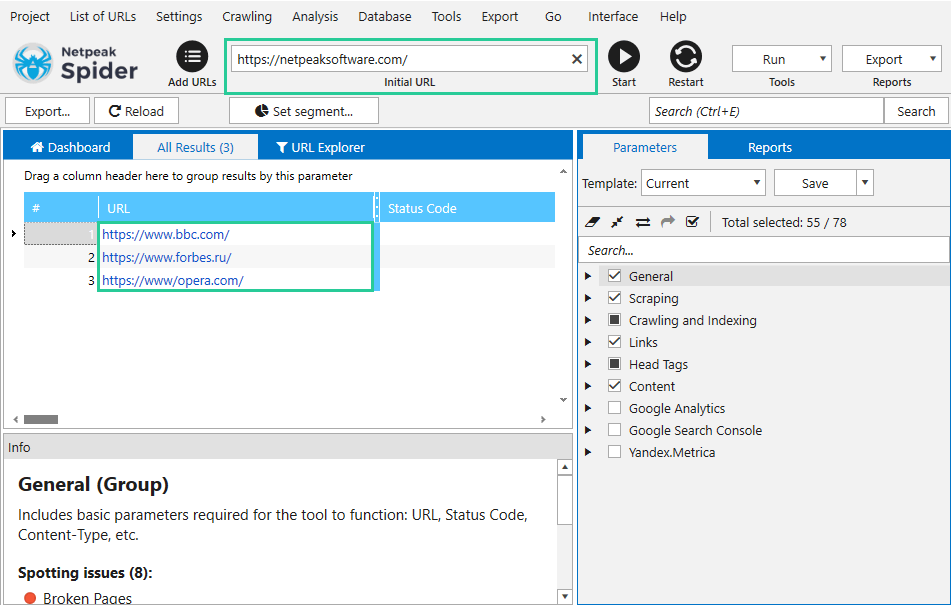
Multi-domain crawling is a feature that allows you to simultaneously crawl multiple domains within one session.
Crawling data is displayed in a single table, and a standard set of Netpeak Spider opportunities is available for further work.
The feature allows:
- crawling multiple domains
- crawling the list of URLs and spotting broken links
- finding pages with contact details from the list of sites.
2. How to enable multi-domain crawling in Netpeak Spider
To enable the feature you need:
2.1. Tick the ‘Enable multi-domain crawling’ on the ‘General’ tab of the program settings.
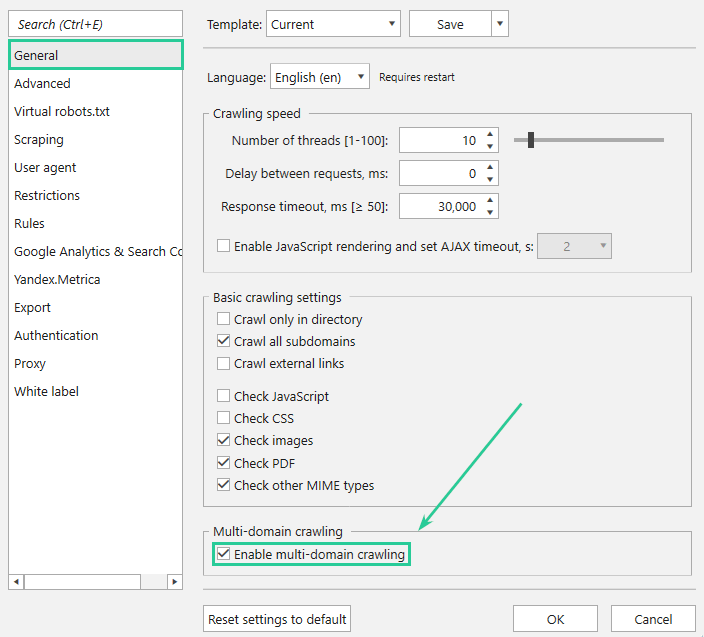
Note that the ‘Enable multi-domain crawling‘ and ‘Crawl only in directory‘ items are not compatible. When you select one, the second is disabled automatically.
2.2. Add the addresses of the necessary domains to the main table:
• using the ‘Add URLs‘ button;

• selecting one of the possible options to add URLs from the ‘List of URLs‘ in the drop-down menu.

2.3. Run crawling with the ‘Start‘ button. The program will simultaneously crawl all domains. If a URL was entered in the ‘Initial URL‘ field, it will also be crawled.
Notice:
• all URLs that have been entered in the table and in the ‘Initial URL‘ field must return 200 status code
• when the crawling is completed, all host URLs specified in the ‘Initial URL‘ field will be considered internal, and the results from the main table external
• for this type of crawling, it is impossible to specify the maximum number of crawled URLs for each domain in the ‘Restrictions‘ tab of the settings.
3. Work with crawling results
When the crawling is completed or paused, a standard set of reports will be available to export. If you need to work with a certain share of the results, filter them in the following way:
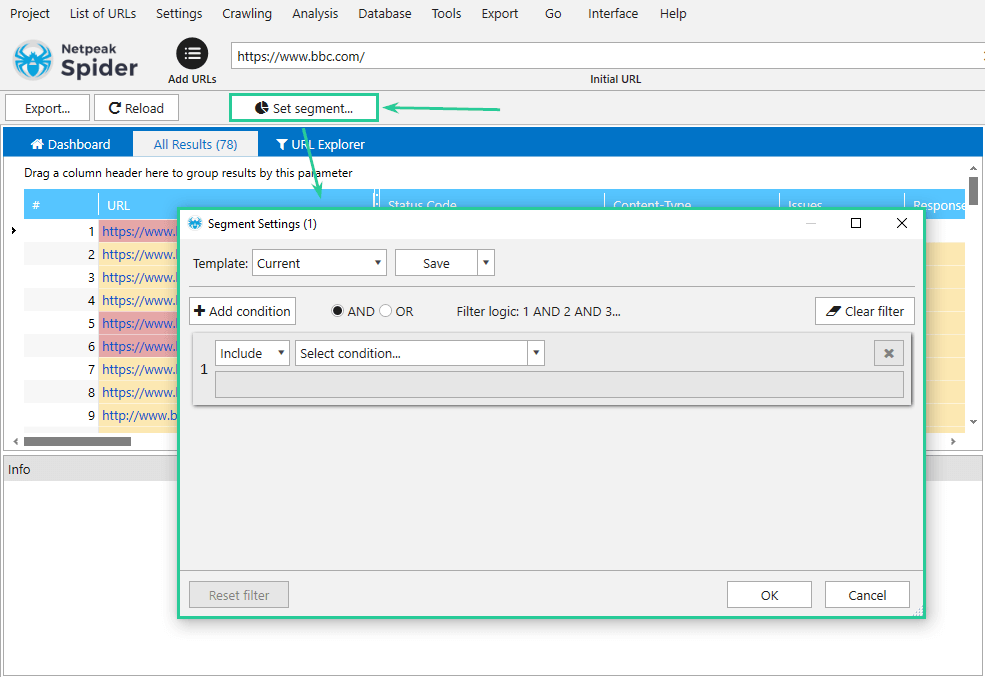
- Filter necessary information using the segmentation feature. You can set an unlimited number of filters
- Filter results on the ‘Overview‘ tab of the sidebar by a specific parameter, applying it as a segment
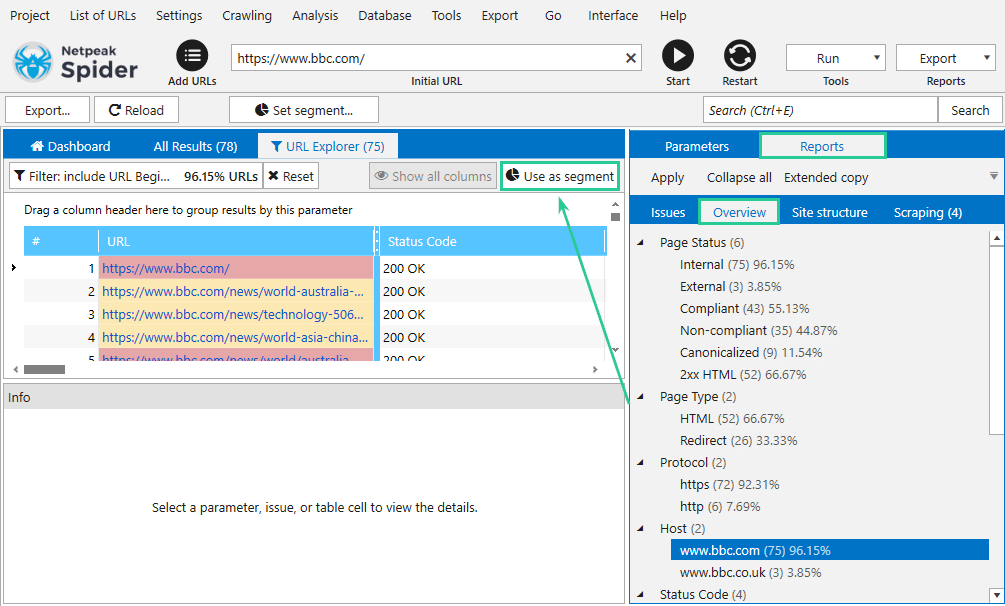
- Filter results on the ‘Overview‘ tab of the sidebar by a specific issue, applying it as a segment as well
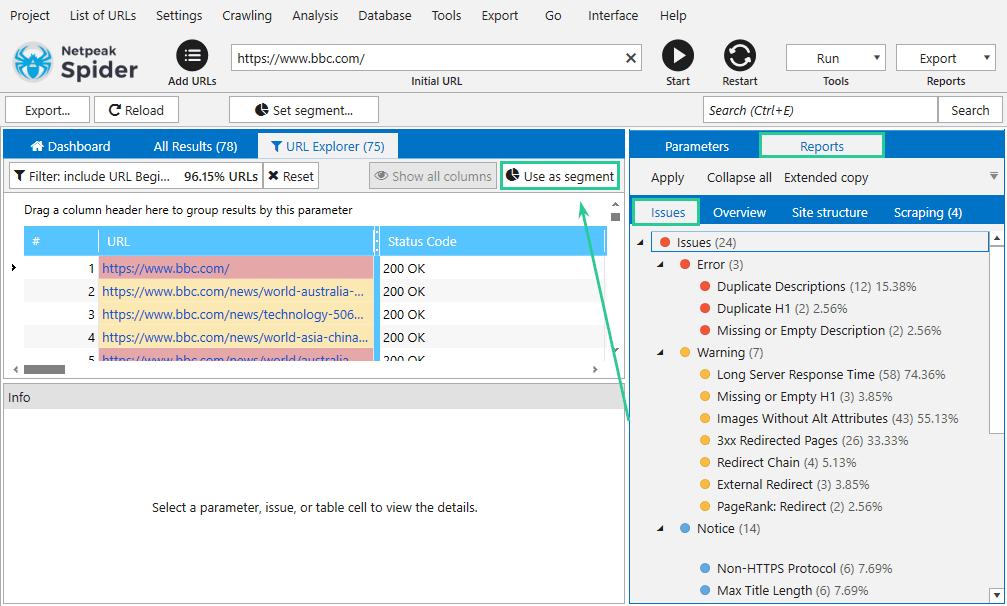
Once a segment is applied, the program will show you data only on the selected group of pages.
Dashboard, ‘Overview‘ tab, Issues, Database, Reports, etc. will also be regrouped according to the selected segment.
You can find more information about this feature in the blog post ‘How to Use Segmentation in Netpeak Spider‘.
4. Usage example
4.1. Multiple Domain Analysis
To save time while regularly checking domains for SEO issues and broken links, you can crawl them during a single session using the multi-domain crawling function. To do so:
- Mark the option ‘Enable multi-domain crawling‘ on the general settings tab.
- Add a list of domains to the main table.
- Select the necessary parameters for analysis in a sidebar.
- Press ‘Start‘ and wait for the crawling to complete.
- Segment the results depending on your tasks.
Optionally, you can limit the crawling depth on the ‘Restrictions’ settings tab to analyze domains without going deeper than one URL from the main page.
4.2 Contact Details Search
To collect contacts (email, mobile phones) from several sites simultaneously in a quick way, you need to:
- Tick ‘Enable multi-domain crawling‘ on the general settings tab.
- Add a list of domains to the main table.
- Select the ‘Minimum’ template in a sidebar to speed up the crawling process.
- On the ‘Restrictions’ settings tab, set the click depth at ‘1‘, since the ‘About Us‘, ‘Contacts‘ and the like pages are located exactly at that depth.
- Press ‘Start‘ and wait when the crawling is finished.
- Transfer the results to Netpeak Checker and check them for contact information.
4.3. How to check the broken links in the URL list
To check the broken links in the URL list, you need to:
- Add the URL list (it can be downloaded from XML Sitemap).
- Set ‘1’ click depth in the settings.
- Review the broken links in the main table and the broken links report.
Was this article helpful?
That’s Great!
Thank you for your feedback
Sorry! We couldn't be helpful
Thank you for your feedback
Feedback sent
We appreciate your effort and will try to fix the article