1.1. Configuring filter conditions
2.2. The ‘Issues’ tab in the sidebar
6. Export the results after filtering
The results filtering in Netpeak Spider allows you to view specific pages extracted from the total number of results.
For your convenience, we have implemented a range of choices: customize the filter conditions or use default filters.
Default filters allow you to quickly access the most important blocks of data in one click. They can be found on several tabs such as:
- ‘Dashboard’ on the main panel.
- ‘Reports’ in a sidebar (‘Issues’, ‘Overview’, ‘Site structure’ and ‘Scraping’).
See section 2 to learn more about these filters.
1. Custom filtering
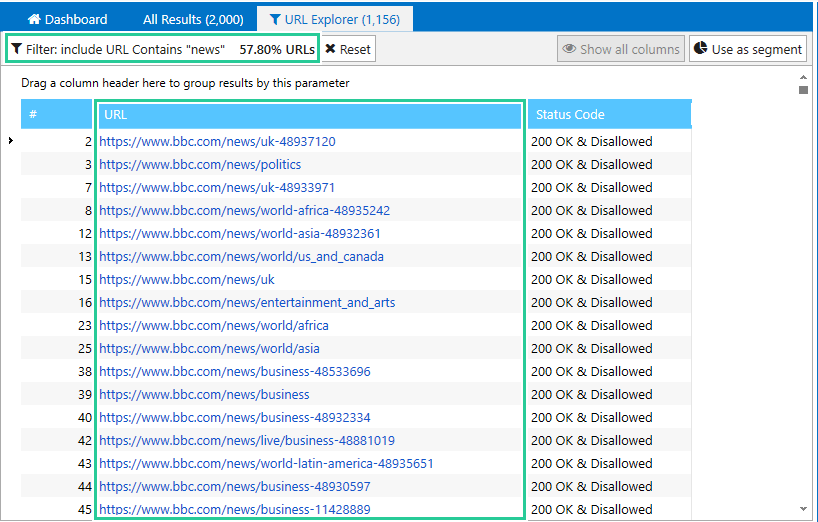
Click on the ‘Set filter’ button on the ‘URL Explorer’ tab to open the window for configuring filter conditions or use the ‘Ctrl+F’ hotkey.

Once a filter is applied, the name of this button will be ‘Filter’: include/exclude [Filter condition]’. The ‘URL Explorer’ table will contain URL that match corresponding conditions.
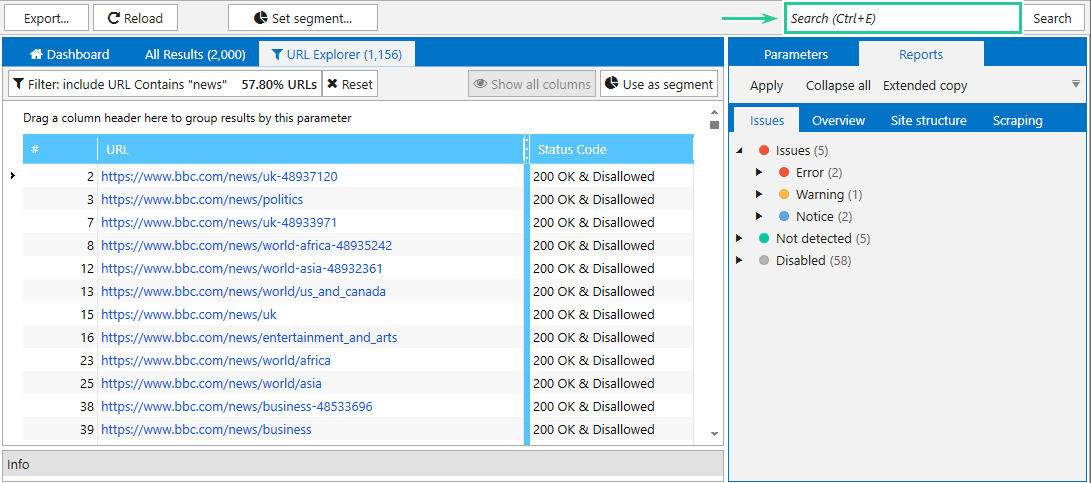
If you need to search for a value in all columns, use a quick search feature. To do so, enter a required search query to the control panel or use the ‘Ctrl+E’ hotkey,
1.1. Configuring filter conditions
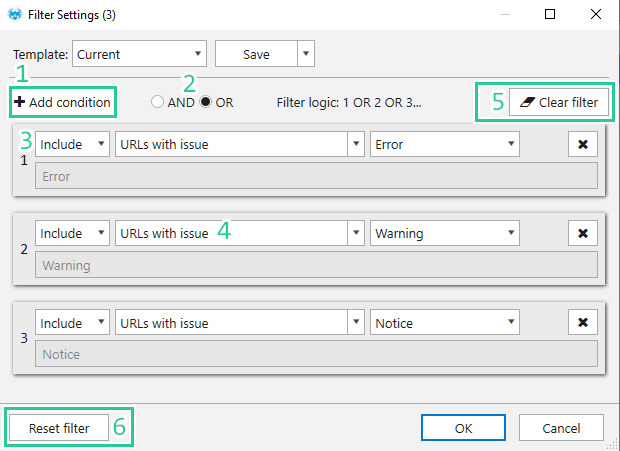
On the filter panel you can:
1. Add a condition (Ctrl+N) → allows configuring several filter conditions concurrently.
2. Select filter logic:
- AND → combines several rules: filter will be applied only if all set rules return ‘True’ at the same time.
- OR → filter will be applied only if at least one rule returns ‘True’.
3. Select rule condition: ‘Include’ or ‘Exclude’ particular URLs.
4. Choose the parameters from the drop-down menu, according to which the pages will be filtered.
5. Remove all rules.
6. Reset filter to clear the table in ‘URL Explorer’. In comparison to ‘Clear filter’, resetting will not remove the entered rules.
1.2. Filter templates
Netpeak Spider has some default filter templates which can be helpful in solving common SEO tasks:
- Current → current settings that don’t correspond to any other template.
- Default → default filter settings without any rules.
- All issues → filter template that contains all rules to filter the pages according to the severity of issues.
- SEO compatibility → rules that show only compliant pages (those that potentially might be indexed by search engines – without images, files, hidden service pages).
Netpeak Spider also allows creating custom templates. To do so, click on the ‘Save’ or ‘Save as’ button once the rules are set, enter a template name and press OK.

2. Default filters
2.1. The ‘Dashboard’
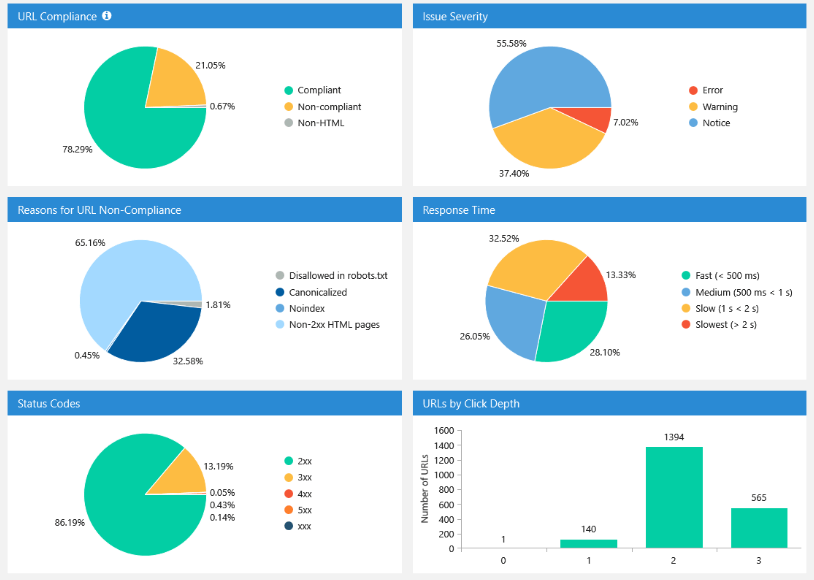
Once crawling is finished, the ‘Dashboard’ tab will display statistics represented in diagrams and pie charts for the current project. By clicking on any part of a pie chart, the program will filter the data according to the selected condition.
2.2. The ‘Issues’ tab in the sidebar
You can enable displaying all pages where a certain issue was found, as well as pages with issues of a certain severity. To do this, click on the item you are interested in on the ‘Errors’ tab so that the corresponding pages will be included in the ‘URL Explorer’ table.
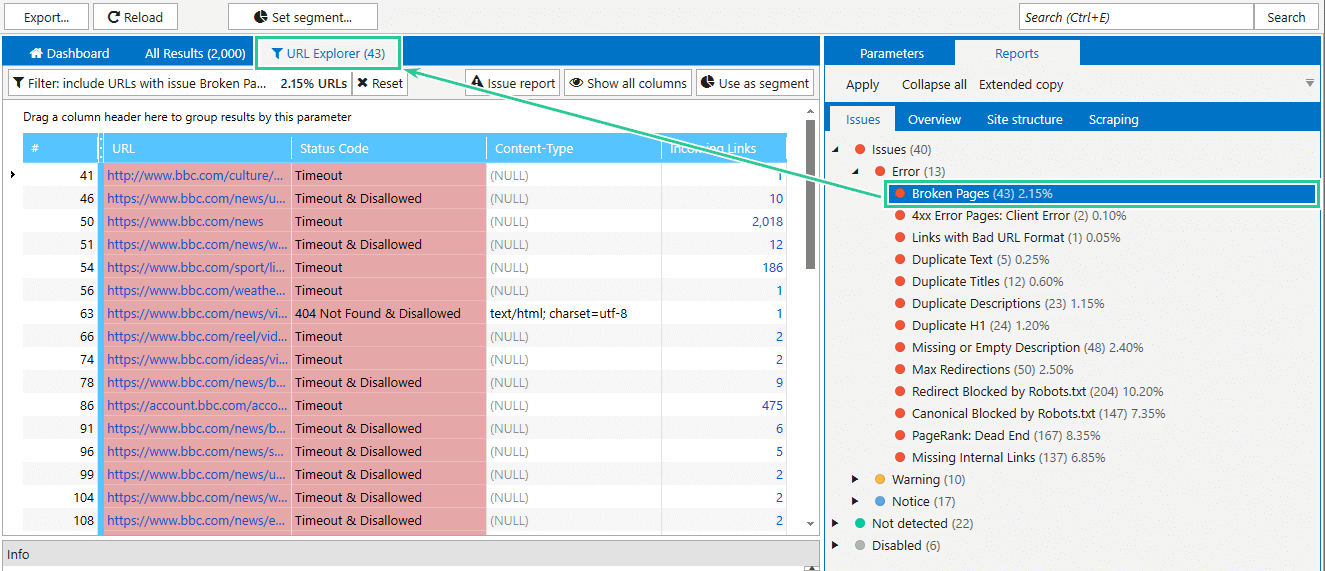
By default, the table contains only data related to the selected issue. However, you can see all the parameters by clicking on the ‘Show all columns’ button in the tab header.
There is also the ‘Issue report’ button, which will open an additional table with a special report in it.
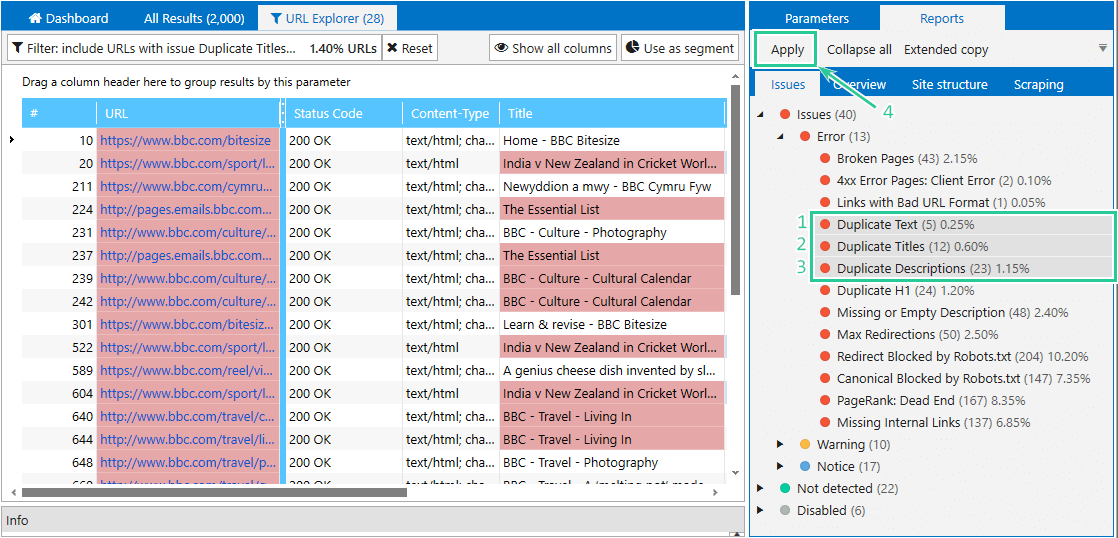
Please note that you can filter the results by several issues. To do so, select a few issues reports pressing Ctrl and then click the ‘Apply’ button at the top of the sidebar.
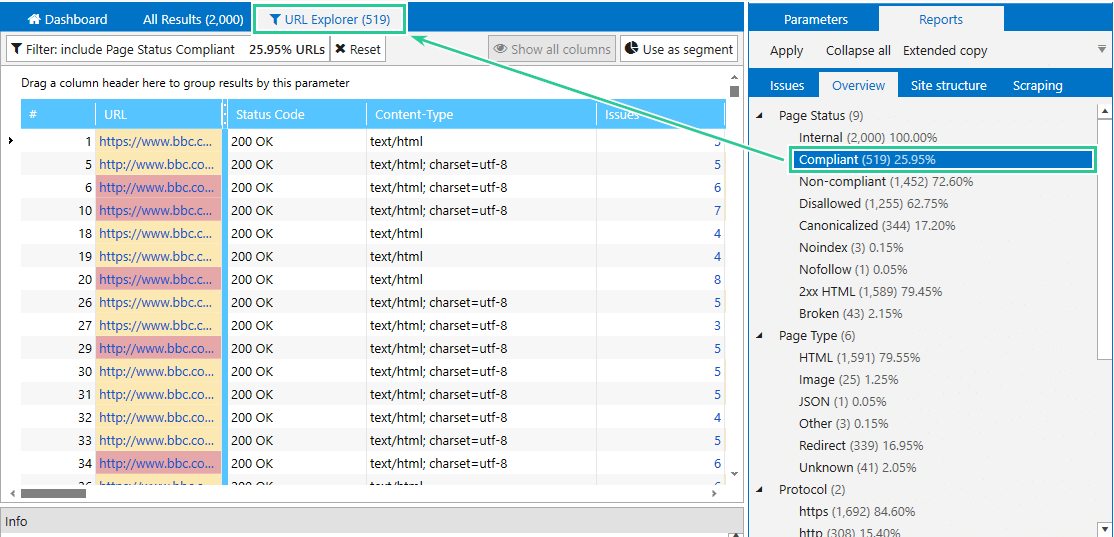
2.3. The ‘Overview’ tab
All data displayed on the ‘Overview’ tab has filters as well. The corresponding data will be displayed in the ‘URL Explorer’ table once any option is selected.
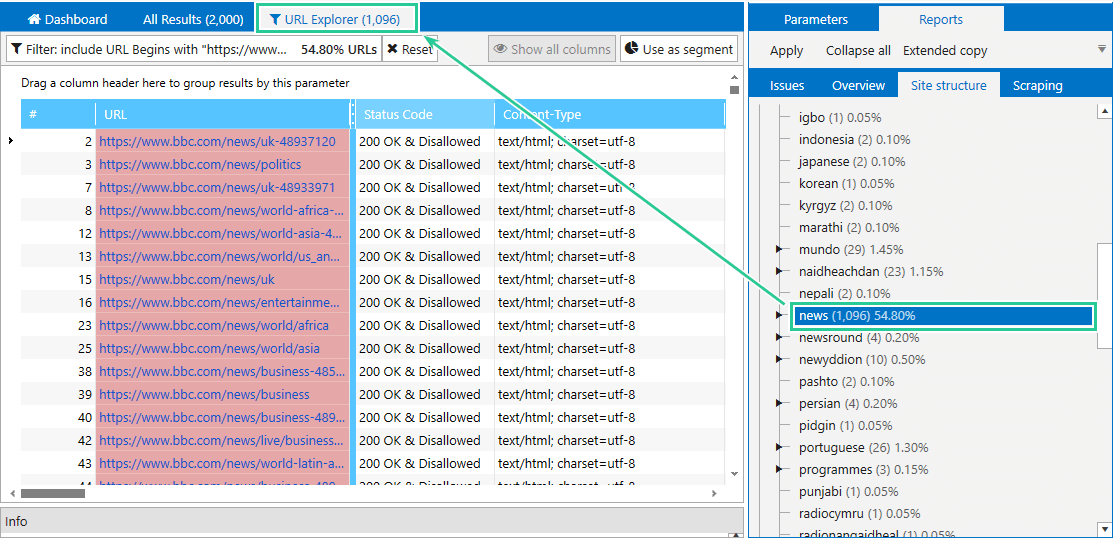
2.4. The ‘Site structure’
Choose any category or subcategory to see a list of its internal pages.
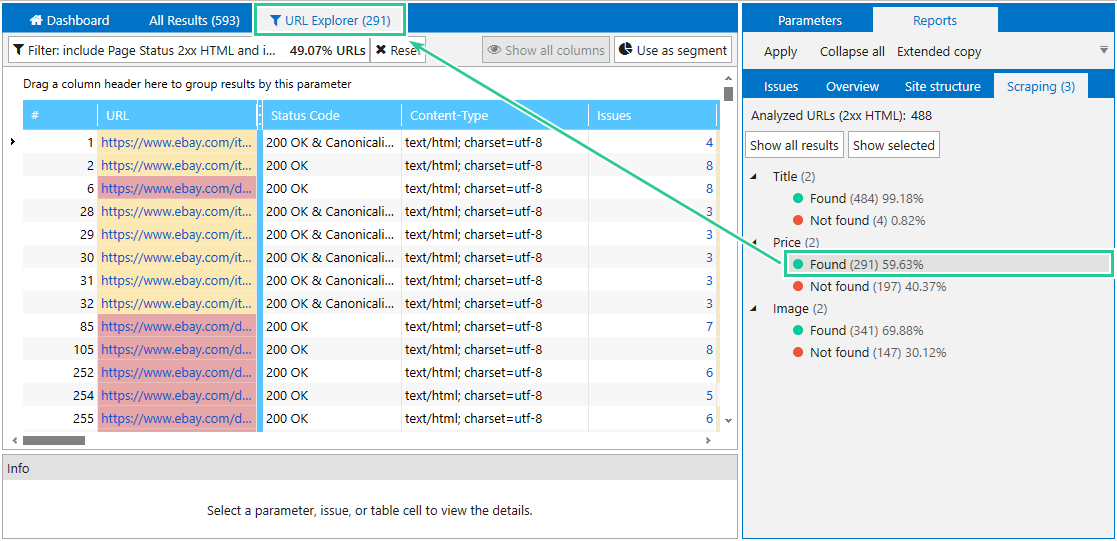
2.5. The ‘Scraping’ tab
Click on the ‘Found’ section to view the pages that contain a chunk of code matching corresponding custom parameters. To see the pages that don’t contain it, select ‘Not found’. The results will be displayed on the ‘URL Explorer’ tab.
3. Filtering by value
Netpeak Spider allows you to quickly filter the results based on the selected data in cells.
Filtering by value is available in:
- main tables;
- all tables from the ‘Database’ module;
- tables in the ‘XML sitemap validator’ tool.
For instance, if you notice that some pages return 404 status code, select the current cell in the ‘Status code’ column and choose the ‘Filter by value’ option in the context menu (or use the ‘Alt+F’ hotkey).
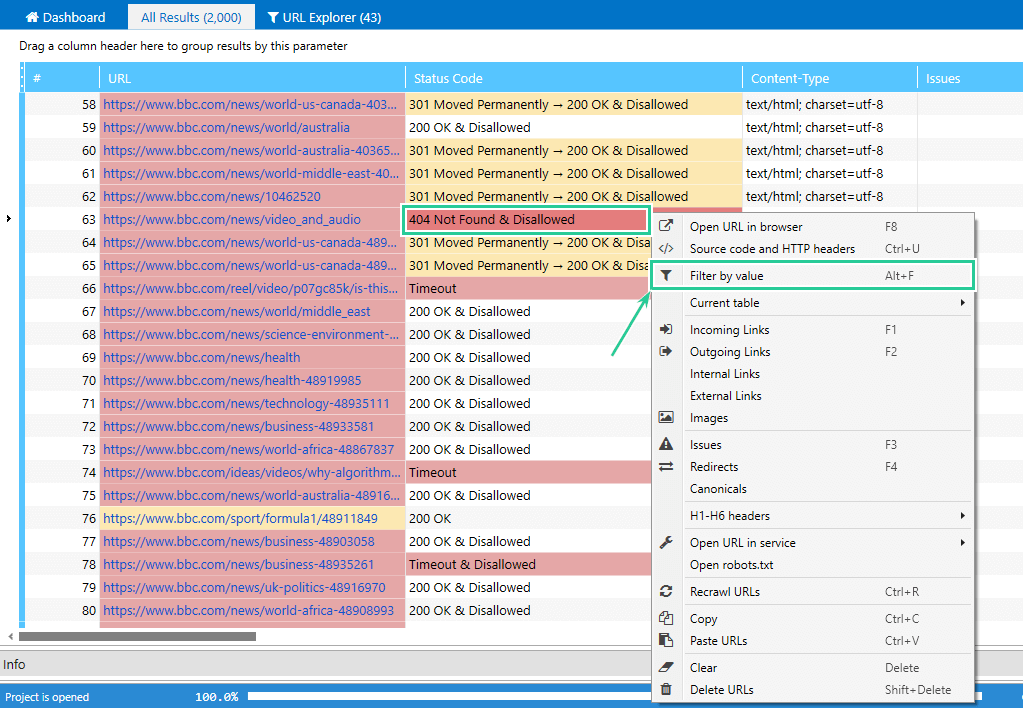
It is also possible to select several cells inside one line.
4. Segmentation
By default, the filter is applied to all results. You can also apply filtered results as a segment and work with a particular group of pages.
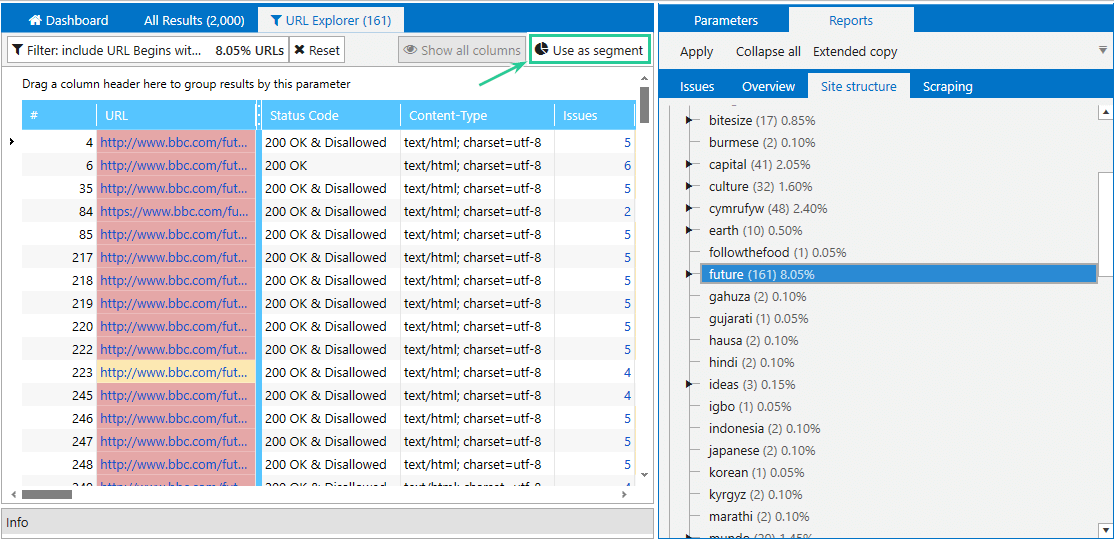
To apply segmentation to filtered data, click on the ‘Use as segment’ button located on the right corner of control panel. Then, you will see all reports only for a selected group of pages.
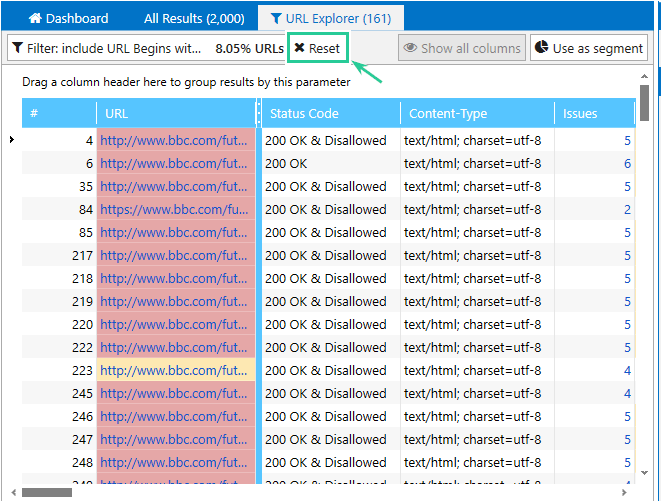
To reset segmentation, click on the ‘Reset’ button next to the name of the applied segment.
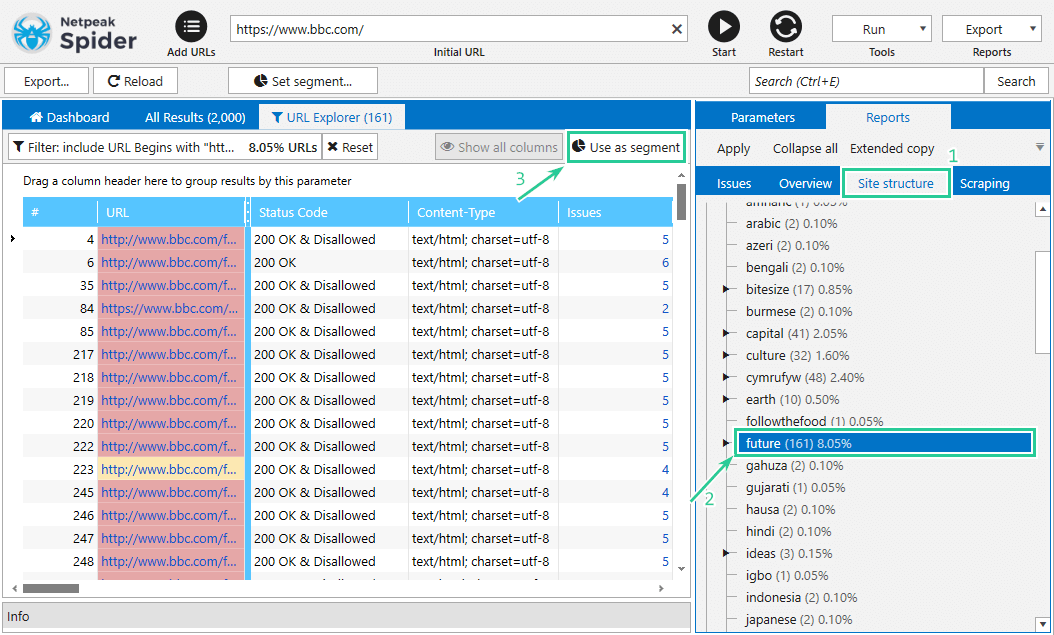
5. Example of using segmentation
To check all issues on pages from a particular category, follow these steps:
- Open the ‘Site structure’ tab.
- Choose a necessary category or subcategory.
- Click on the ‘Use as segment’ button.
6. Export the results after filtering
There are few ways you can save the results once a filter is applied:
- Click on the ‘Export... ’ button on the left side of the control panel on the ‘URL Explorer’ tab → it will export the current table results.
- Choose the ‘Current table results’ option from the drop-down menu ‘Export (Reports)’.

Was this article helpful?
That’s Great!
Thank you for your feedback
Sorry! We couldn't be helpful
Thank you for your feedback
Feedback sent
We appreciate your effort and will try to fix the article